NavShip Tutorial

Calculate a route
To calculate a route with NavShip, you first need a starting point. This can be defined in various ways.
Enter the location in the magnifying glass at the top right and select the correct option from the suggestions. A small menu will then open and you can set this location as the starting point.
Search for the location directly on the map and tap it or briefly press and hold on the point; the menu will then also appear and you can select the starting point.
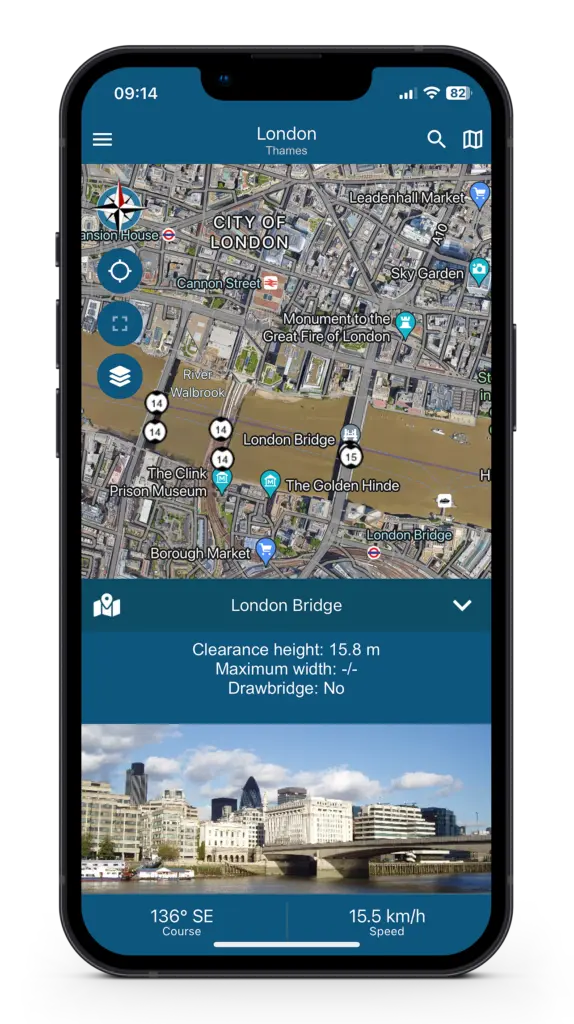
If you click on one of the markers on the map, e.g. a bridge or marina, there is also a map button in the description window at the top left. This also opens the menu for setting the starting point. (see picture)
You can select the destination in the same way as the start. If you do not specify a starting point, the route will be calculated from your current location.
Area selection
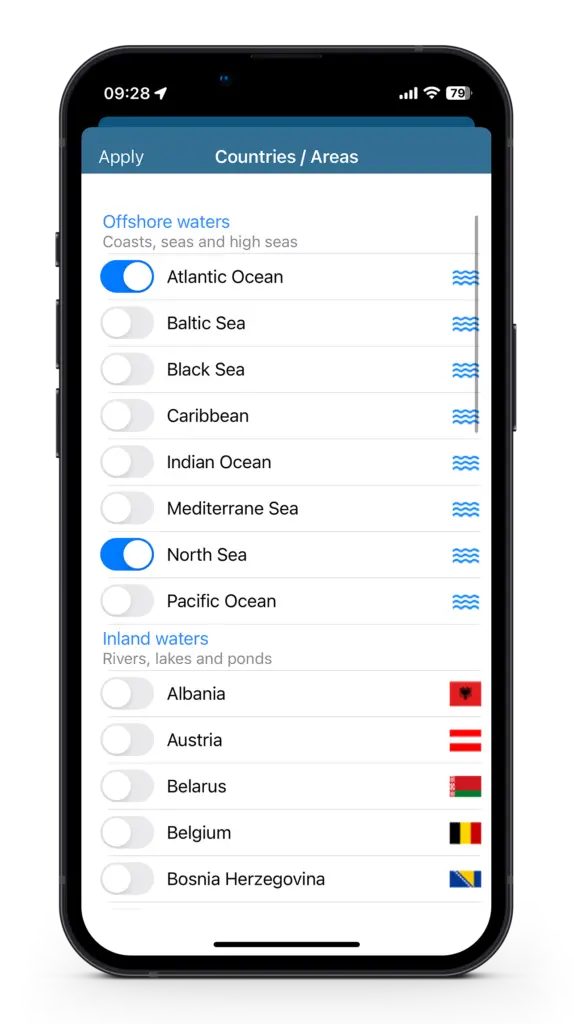
To ensure that the route calculation works correctly, you need to select the correct sailing area. Please note that you must select the country and the nearby coastal or ocean water. You should also activate the neighbouring country/water in border areas.
Changing the sailing area requires an (automatic) restart of the app on Android devices. For iOS devices, there is only a short loading time. This process may take longer depending on how many areas you have selected.
Chosen waterway types affect the route
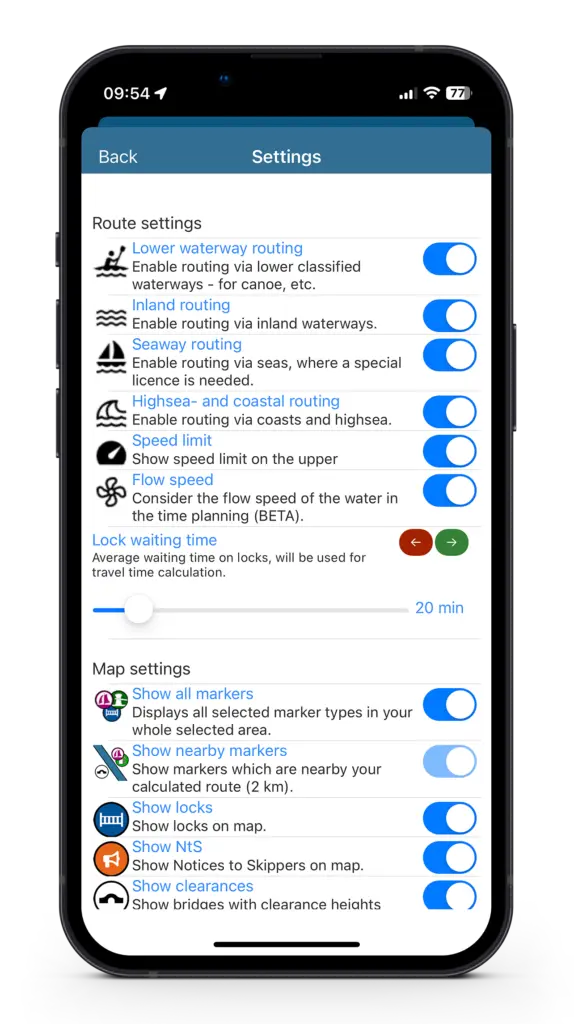
You can use the settings to select which waterways to include when calculating the route.
A number of parameters are used to calculate the route. For example, you can choose whether to take the current speed of the waterway into account or whether to avoid shipping lanes.
If you are having problems calculating a route, it may help to check the selection of water types in addition to checking the sailing areas.
The map view
Use the map icon in the top right corner (on iOS. On Android it’s on the left, next to the layer icon), you can choose which map style you want. For example, a satellite image with labels or the standard map view as shown here.
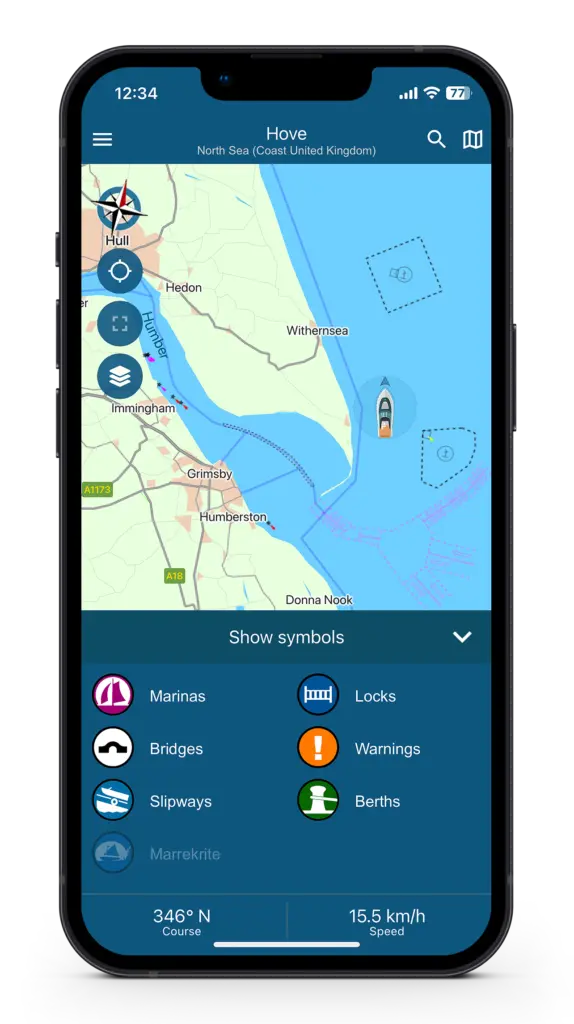
Using the layer button on the left (the symbol with the leaves), you can select which symbols should be displayed on your map.
In addition to locks, marinas, bridges, berths and slipways, you can also display the notices to skippers in many countries.
You can also find an overview of the various countries and the latest news here: https://navship.org/nts/
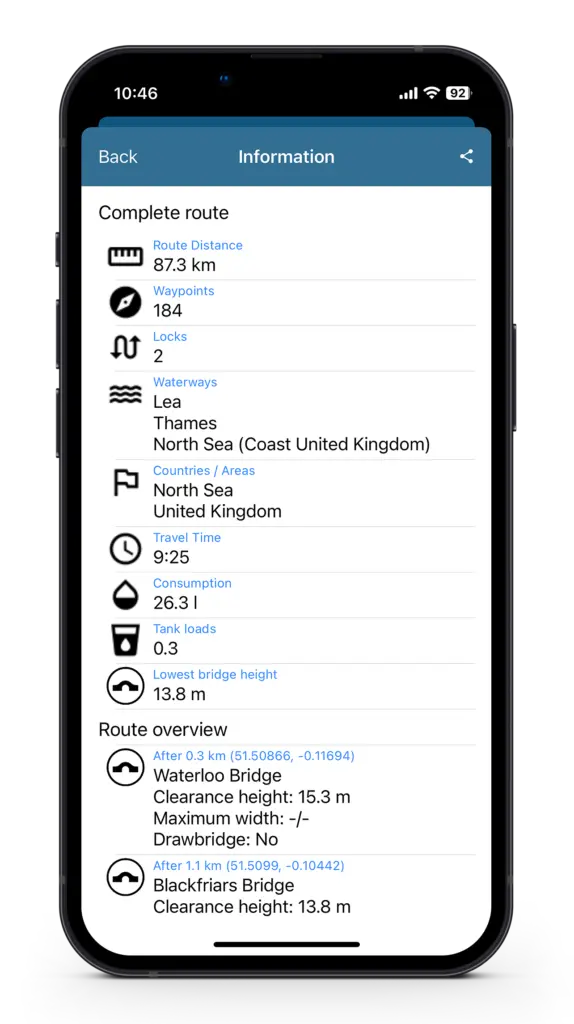
Route information
You can display the details of your route in the side menu under “Information”.
If you click on one of the points in the route overview, you can choose to jump directly to this coordinate. The relevant section of the map will then be displayed.
In the side menu, you can also swap the start and destination, save your route, or discard it.
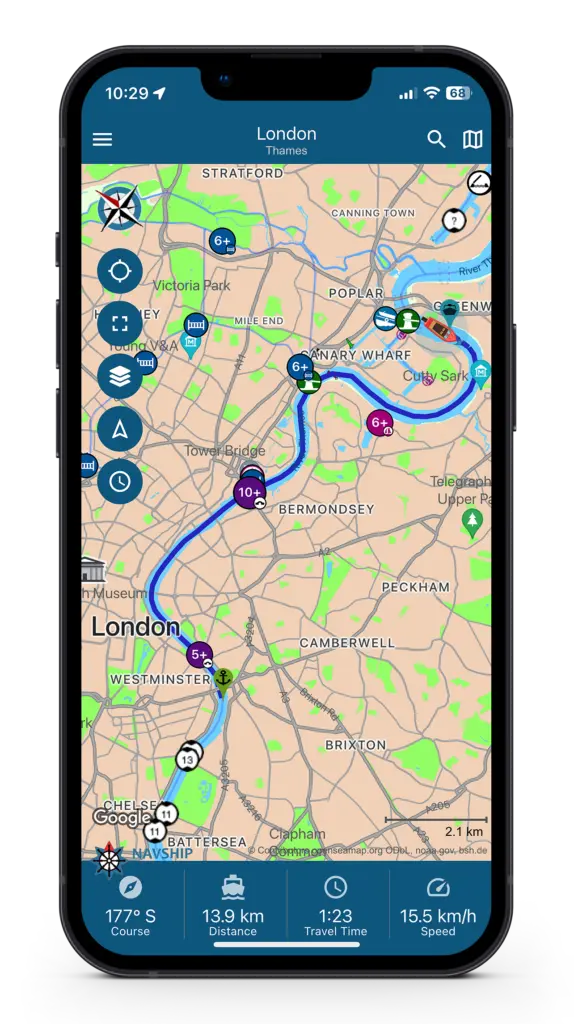
The buttons on the left-hand side
No 1: You can use the compass to point your map back to north if you have rotated it.
2: The reticle makes the map jump to your current location.
No. 3: Click on this icon to view the entire route.
No. 4: The layer icon, see “The map view” for more information.
5: The direction arrow allows you to recalculate the route from your current location at the current time.
No. 6: The clock allows you to change the departure time and date of your journey. This will also take into account any warnings in force at the time.
The bar at the bottom of the screen shows other information such as your course, distance, estimated time and current speed which turns red if you exceed the speed limit.